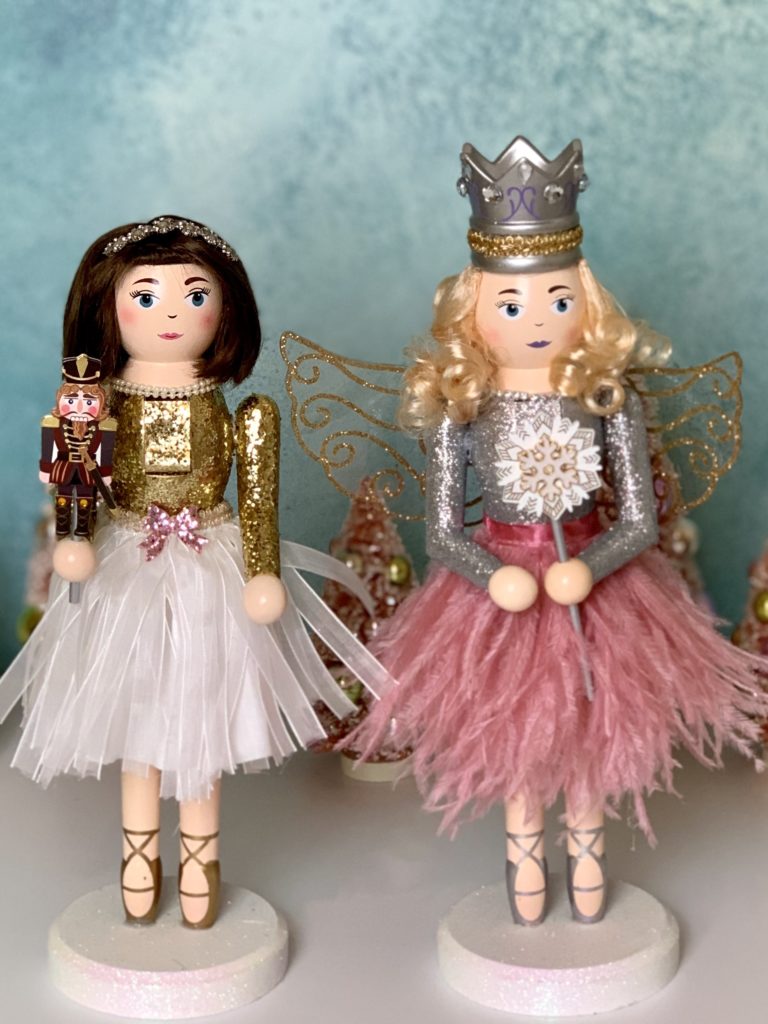
The Nutcracker is my favorite ballet and Tchaikovsky’s musical score can only be described as a masterpiece! I’ve been wanting to create a Nutcracker themed Christmas tablescape for many years, but I never really found any nutcrackers that wowed me. So I stopped searching and opted for a DIY nutcracker project.
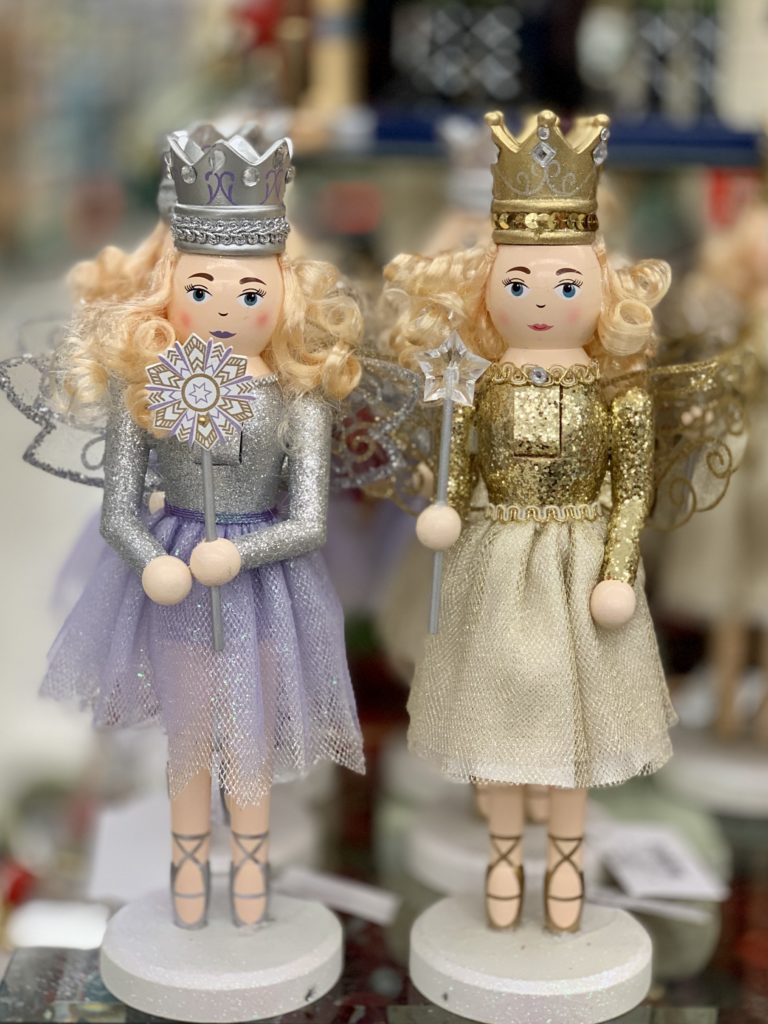
Below I’ll take you step-by-step and show you how I transformed two ordinary fairy nutcrackers into the Sugar Plum Fairy and Clara! Of all the girl nutcrackers at Hobby Lobby, these fairies had the prettiest faces and doll hair. I bought one silver and one gold, and gave them a Tiny Fairy makeover! It’s amazing what a little pixie dust can do. I absolutely love how they turned out and I can’t wait to display them at Christmas! Stay tuned.
SUPPLIES
Sugar Plum Fairy: silver fairy nutcracker, pink ostrich feather trim, gems, pink & white acrylic paint, small paint brush, trim and hot glue gun.
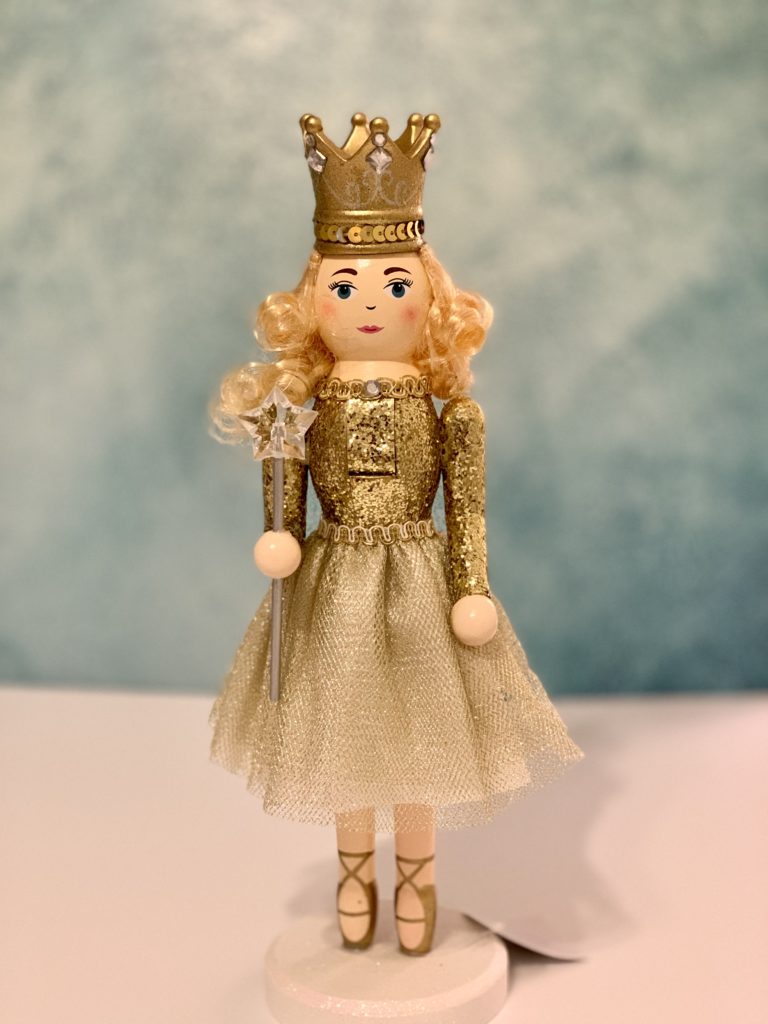
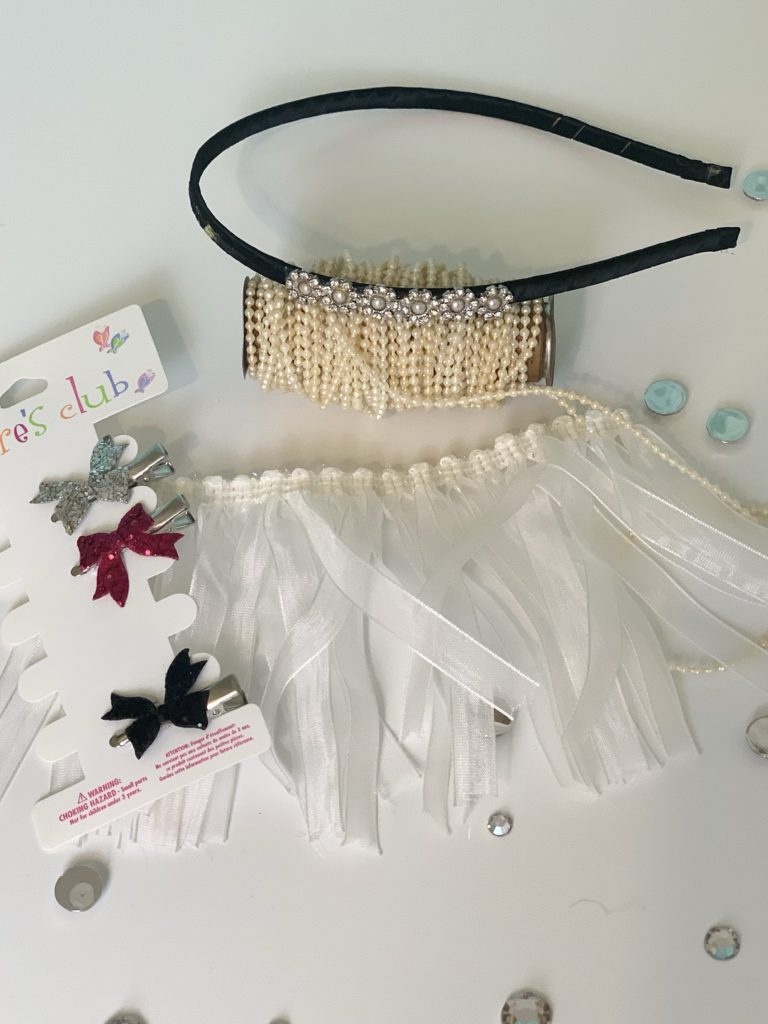
Clara: gold fairy nutcracker, doll hair (sewn on hair net), white chiffon ribbon trim, mini nutcracker doll (wood or 3D paper design), gold trim, string-of-pearls trim, little girl hair accents and hot glue gun.
Note: Nutcrackers were purchased at Hobby Lobby and skirt trim at JoAnn Fabrics. All other supplies are noted below. Don’t forget to use store coupons for extra savings!
SUGAR PLUM FAIRY GLAM MAKEOVER
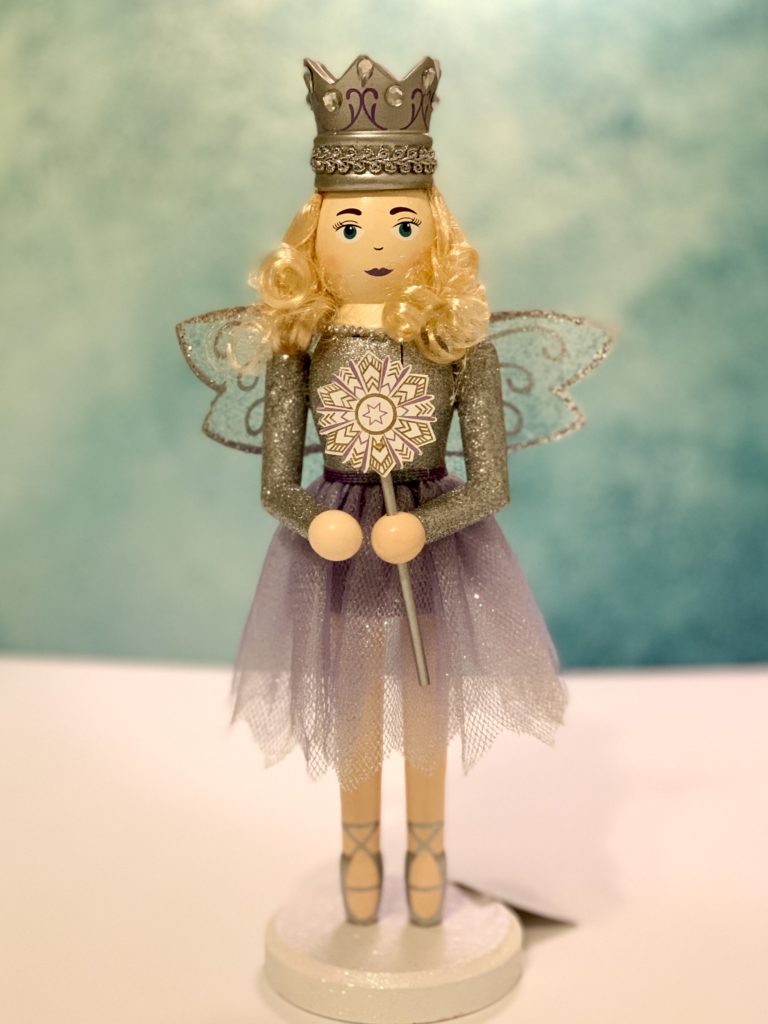
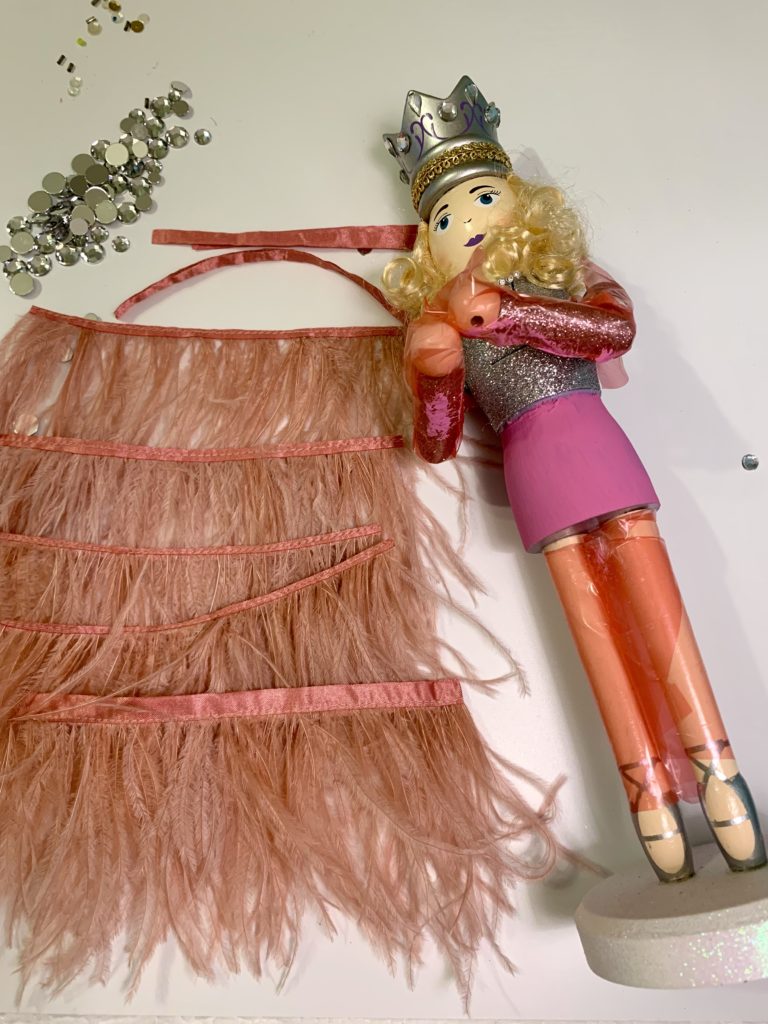
Remove the silver trim and dull circle gems from the crown. Slide out the wand from her hand and remove the silver wings (see note below). Remove and discard her plum tulle skirt and paint her wooden bottom with pink acrylic paint. I used leftover paint from my DIY – How to Paint A Tablecloth.
Tip: To avoid painting her arms and legs, I covered them with plastic wrap. If you are a neat painter, you may not need to do this.
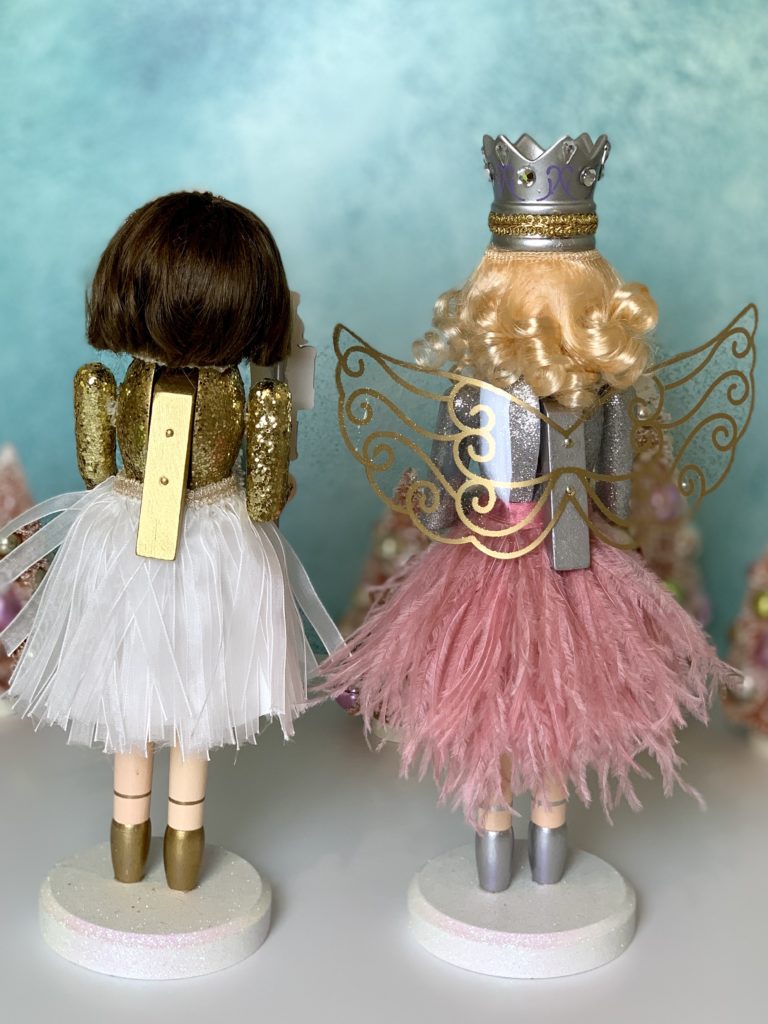
Note: If you’re only making one nutcracker, you can remove the silver glitter from the wings with a razor blade, trace the design with a thin line of Elmer’s glue and dust with gold glitter. If you’re making two nutcrackers, discard the silver wings and replace with the gold wings, like I did.
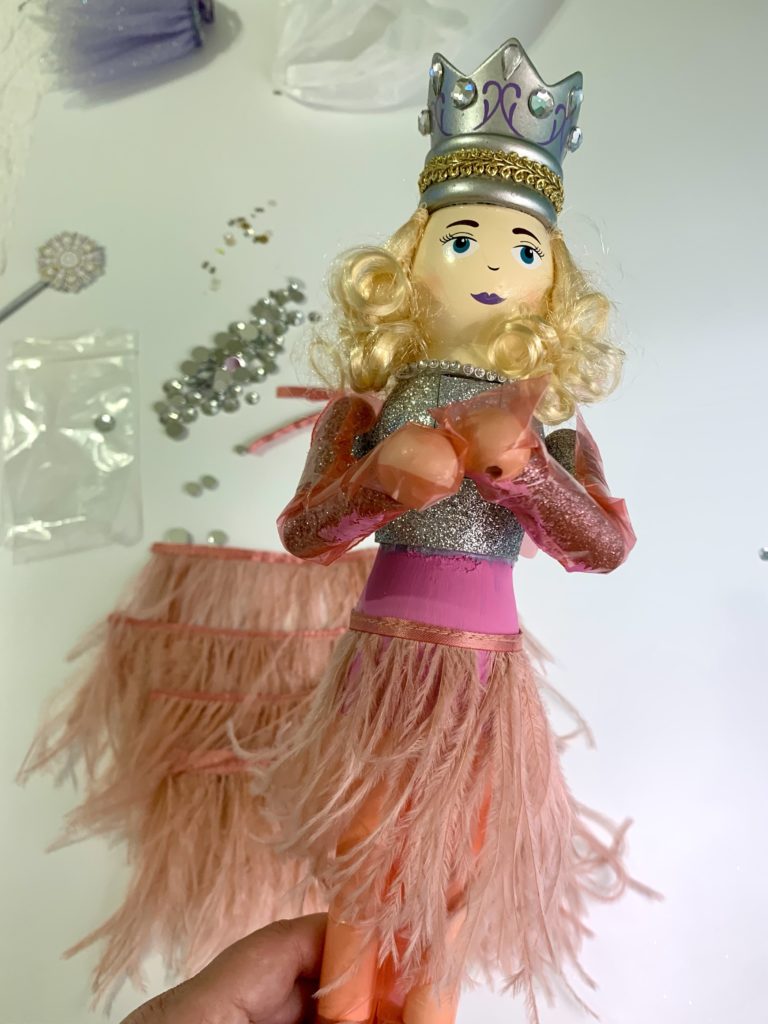
To obtain a full and fluffy feather tutu, you’ll need a full yard of pink ostrich feather trim. I purchased mine in-store at JoAnn’s with a 50% off coupon, but you can also source online. The yard yielded five sections – four for the underlay and a longer one for the tutu’s top layer. The underlay will give the tutu the volume it needs. For the underlay only, trim the satin banding close to the stitching. Trimming the band by half makes it easier to work with and reduces its visibility through the feathers. See how closely I trimmed them in the image below.
Because you want a tutu instead of a gown, begin gluing the underlay half way below the waist. Measure the diameter and cut the trim at the seam, don’t overlap. Much like building a cake, you will glue the underlay from the bottom up toward the waist, starting midway up the wooden skirt. Begin at the back so the seams are at the back and the front is flawless. Glue around to the front in a straight line and circle around until the seam meets. Repeat the step until all the underlay sections have been glued. The final segment will be glued at the waist and the untrimmed satin band will be the tutu’s waistband. Since this section is slightly longer, you can overlap the layer to ensure a proper snug it.
Note: A thin line of glue is enough to secure the trim. Excess glue can create a mess and/or burn you.
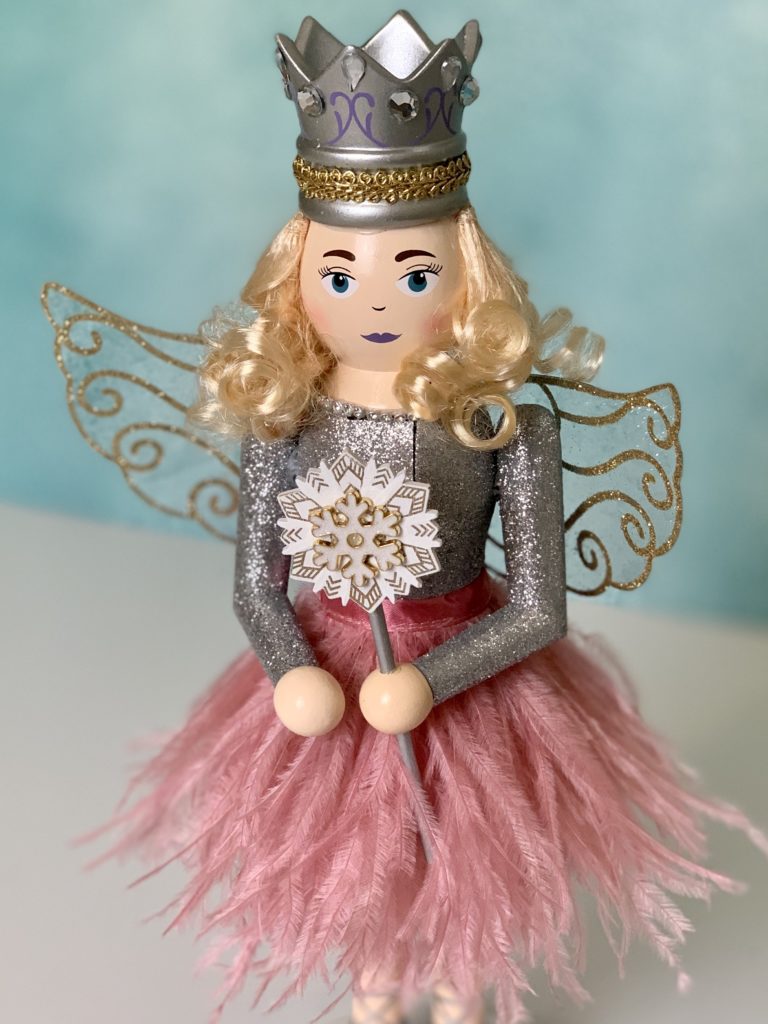
The wand has plum and gold markings, but I only wanted the gold to shine. I used white acrylic paint and a thin brush to paint over the plum markings and set the wand aside to dry. Glue sparkly gems and gold trim onto the crown, again keeping the seam at the back. I had the gems, trim and charm in my crafts bin, but you can find them at any craft store. Once the paint on the wand is dry, glue on a pretty charm like this snowflake charm. Insert the wand back in her hand.
Because I purchased two fairy nutcrackers, I had both silver and gold wings. I used the gold wings on the Sugar Plum Fairy and discarded the silver wings. Clara didn’t need wings. This was a time saver. Touch up the hair, as needed and ta-da!!
Note: I wrapped her curls around my index finger and gently releasing them.
Isn’t she beautiful?! I simply love how she turned out. I love her plum lips and her pink ostrich feather tutu. These simple changes really made her stand out.
CLARA’S DRAMATIC MAKEOVER
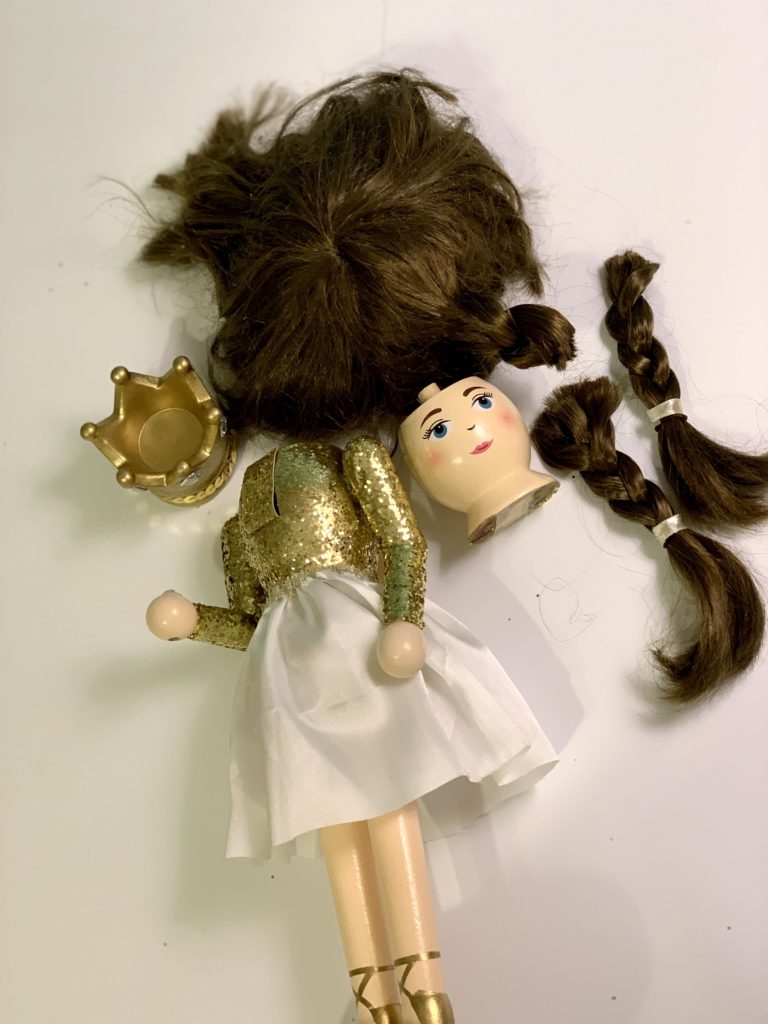
Clara makeover was more complicated because it required removing the crown and adapting doll hair over her flat head. With one quick hammer tap to the back of her crown, the crown came off along with her head! Initially I thought she was ruined, but as I methodically worked on her, it proved to be a blessing. You’ll understand soon.
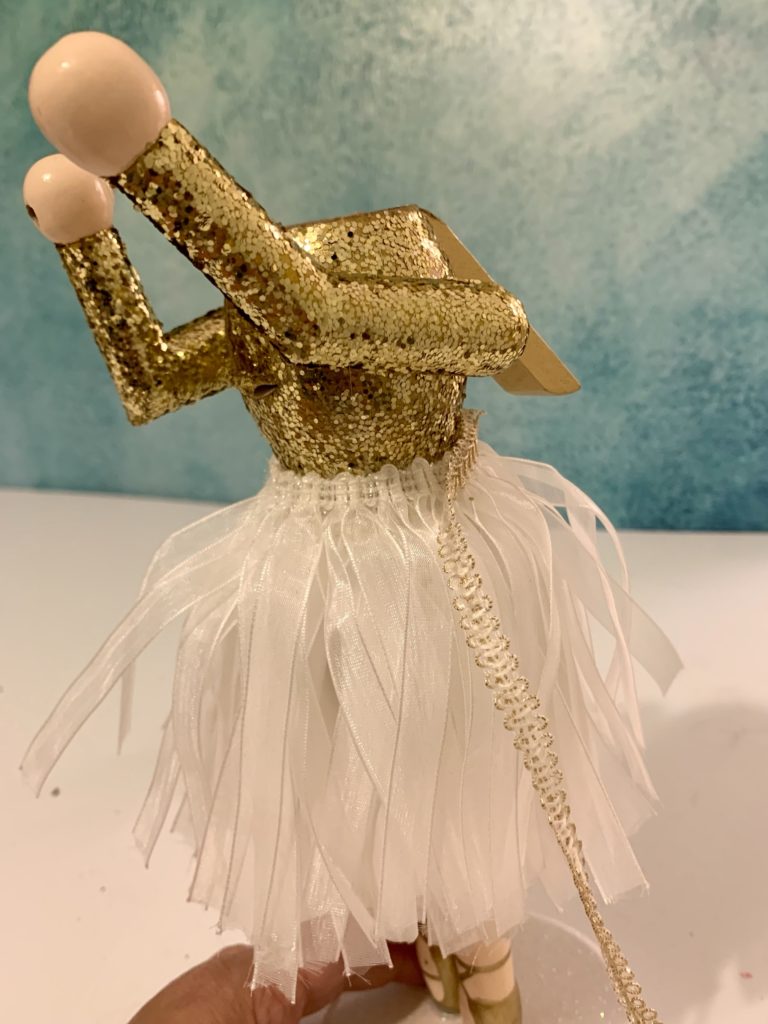
With the crown and head removed, remove the blonde hair, gold tulle skirt (keep the white underlay), gold trim around neck and slip off the wand from her hand. The white chiffon ribbon trim was shorter than the white underlay so I trimmed the underlay by 1/4 inch. If keeping an underlay, always double check the length against the trim so you don’t accidentally cut the trim.
CLARA’S HAIR
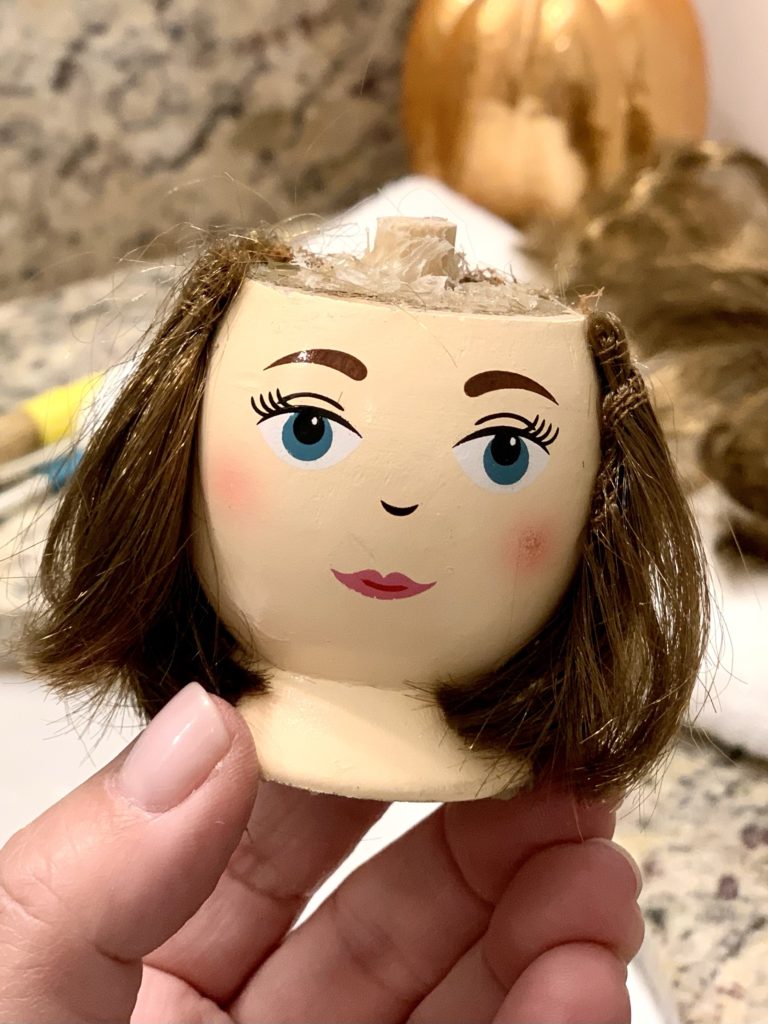
Most dolls have hair sewn into their plastic head, so I couldn’t use any of those. I needed doll hair that was sewn onto a net. I didn’t find any at the craft store, I’m sure you can source them online, but I found an old porcelain doll at Goodwill with the hair I needed. I removed the hair and the dry glue on the net. I kept the doll’s crown intact and cut the bottom layers of hair from the net following the seam lines. Gluing hair onto Clara in sections was very manageable, but because her head was flat, creating volume and a hairline around the forehead was tricky. My best advice is to take your time. Remember to measure twice (or thrice) and glue once.
Note: I wanted to use the doll’s crown section on Clara for a more natural appearance.
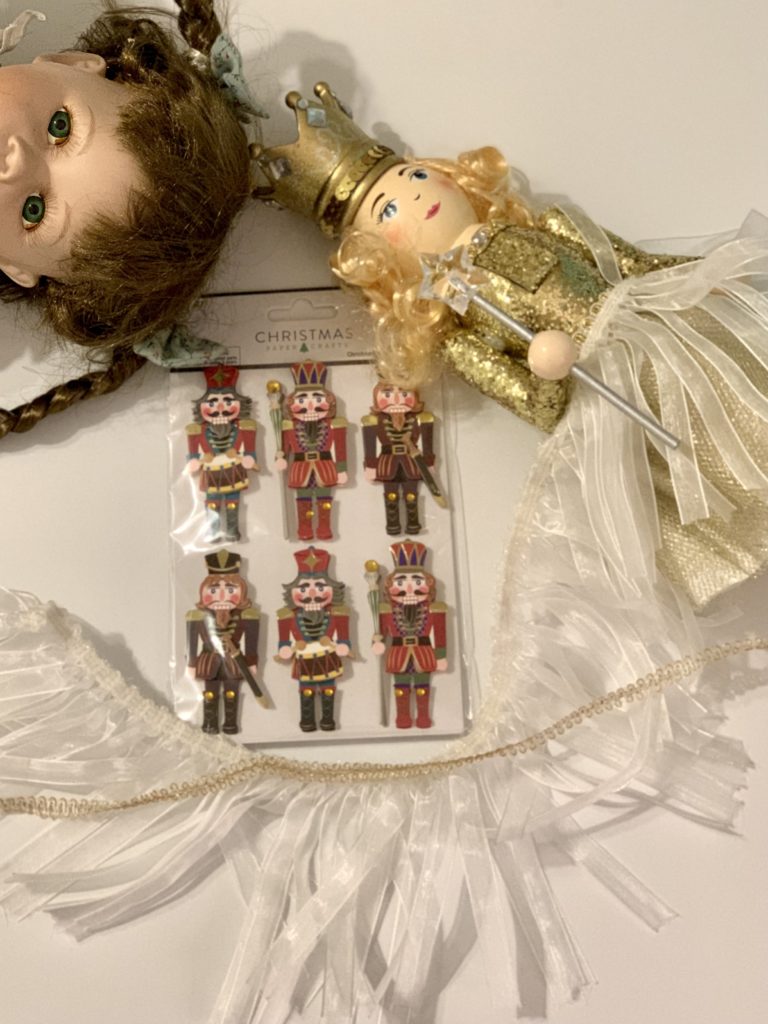
The chiffon trim was purchased at the craft store and other accessories I had at home. The headband and Claire’s Club clips belonged to my daughter from her younger years. I guess I never had the heart to throw them away and now they have new purpose.
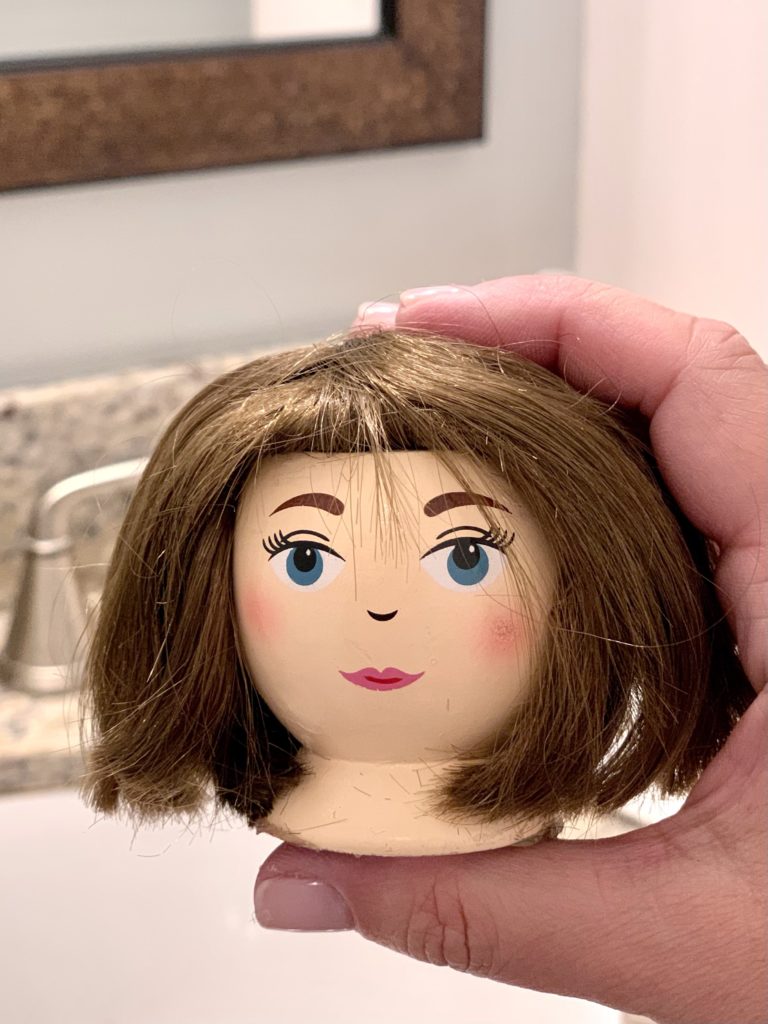
To create a full head of hair, you’ll need to stagger three layers: 1) eye level 2) flat top, and 3) crown. Determine where you want her hair to fall, but don’t crowd her face. The crown layer should gently fall over the other layers creating a natural look. Glue the first section around her head at eye level. Glue the second section around her head at the flat top’s edge. The crown layer is the tricky part because you need to create volume at the forehead. The only way I was able to create volume was by creating a poof with a section of the crown. This gave me the volume I need without creating bangs. Clara barely has a forehead so trimming the hair to create bangs would have ruined the hair.
HOW TO CREATE THE POOF
To invert the crown section, place it on the nutcracker in the correct position. Select a smaller section of the hair piece that aligns with her forehead – this small section will be the poof. Flip the entire hair piece forward so it is upside-down before her. Add some glue to the flat forehead area and place the poof section on the glue and allow it to set. Flip the hair crown back in place and adjust so it fits right. Carefully lift the back side of the hair section and glue to secure in place. Trim hair, as needed.
Note: I highly suggest you practice this technique a few times before you use any glue. It took me a few tries to determine how much hair I wanted to section off for the poof. Once the poof was in place and the top hair piece secured, I used the base of her head as a guide and gave her a bob haircut. So headless Clara turned out to be a blessing. I can’t imagine removing hair from her glittery body.
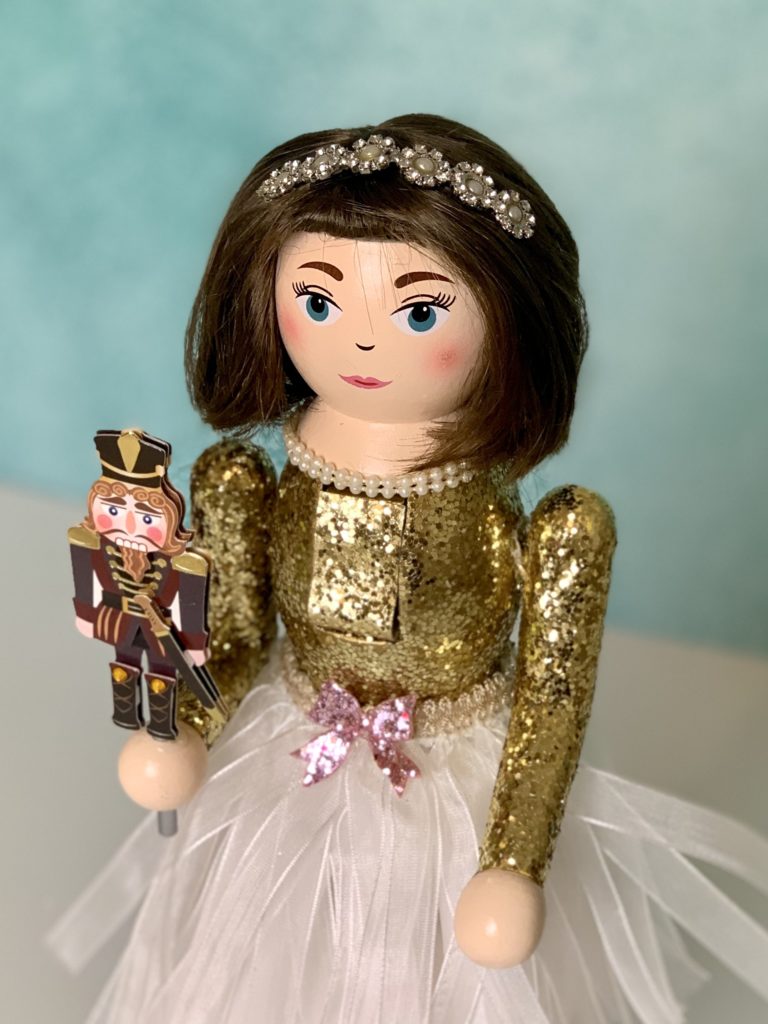
Now glue the white chiffon ribbon trim over the white underlay. Add the detail trim over the skirt and pink glitter bow (from Claire’s Club hair clip) or other detail you may like. Remember Clara is a young girl.
Note: I purchased 1/4 yard and I was able to do two layers.
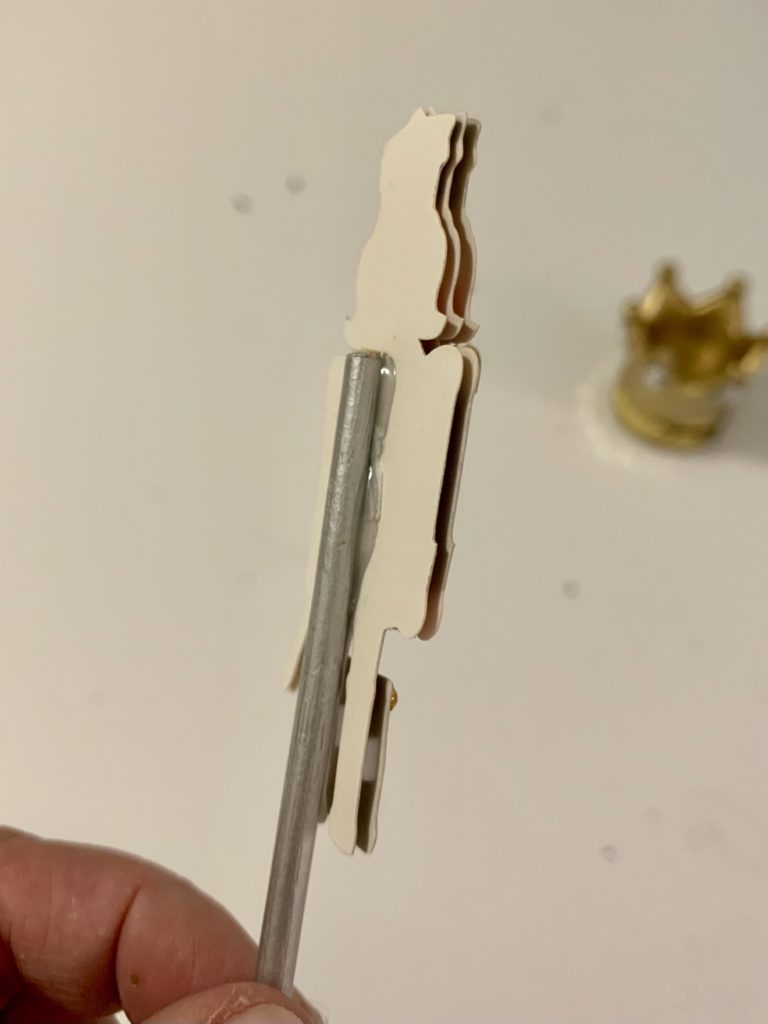
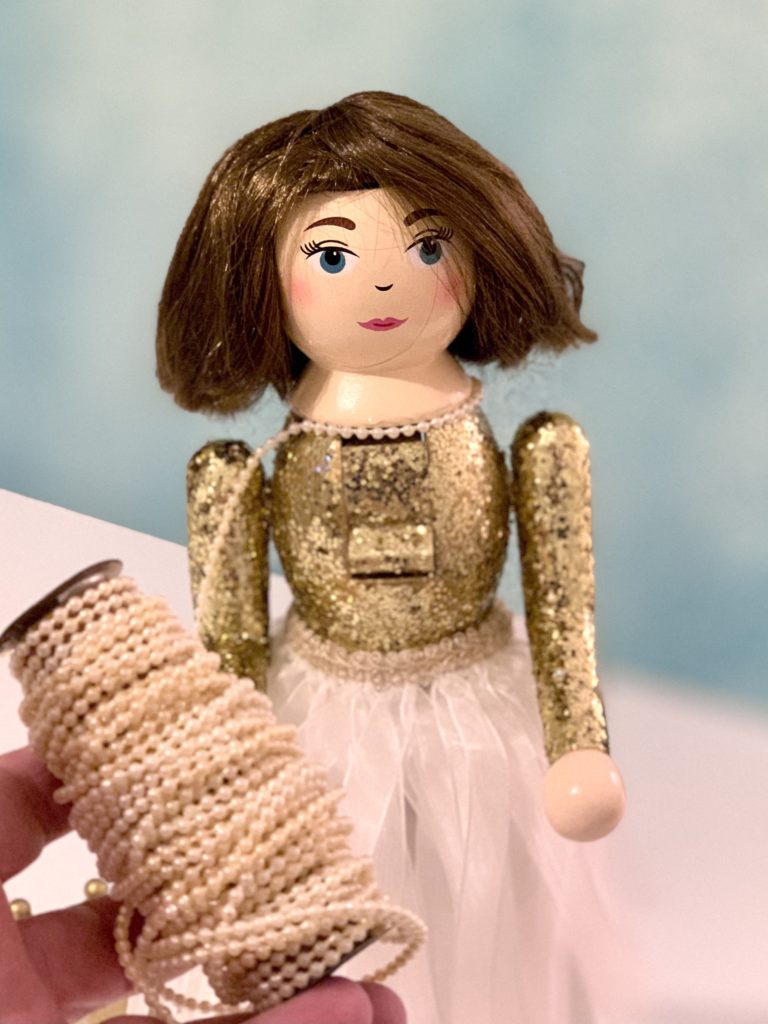
Glue string-of-pearls trim around her neck, or other detail you prefer along with her hair accessory. Trim the wand and glue a mini nutcracker on and place it in her hand.
Note: I didn’t find a mini wooden nutcracker so I found this beautiful 3D paper one at Hobby Lobby.
I’m amazed by their transformation and how uniquely gorgeous they are. If you are familiar with the ballet, you know you’re looking at Clara and the Sugar Plum Fairy. I hope they become cherished Christmas decorations and enjoyed by my grandchildren. For now, stay tuned for a special display.
I hope you’re inspired to makeover your own nutcracker! It can be as simple as changing the tutu or as complicated as Clara’s hair! No matter what you do, it will be special. Leave me a comment below and let me know what DIY projects you’re making? Merry Christmas everyone!
